How to install Peghed Tuners
How to Install PegHed #7543 Tuners
Peghed Tuners (or Peghead Tuners) are lightweight planetary geared tuners. They look like old style tapered friction tuners but have an internal 4:1 gear ratio and are lightweight which make them ideal for ukuleles. As a bonus they are made in the United States. Wow!
About Peghed #7543 Tuners

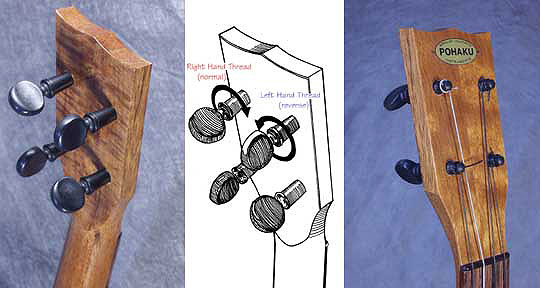

Peghed tuners are manufactured in right hand and left hand threaded pegs. The direction that the string tension pulls is the tightening direction of the threaded tuner.
The ‘normal’ right hand threaded pegs will be installed on the treble side and the left hand ‘reverse’ threaded pegs go into the bass side.
STEP BY STEP INSTRUCTIONS for #7543
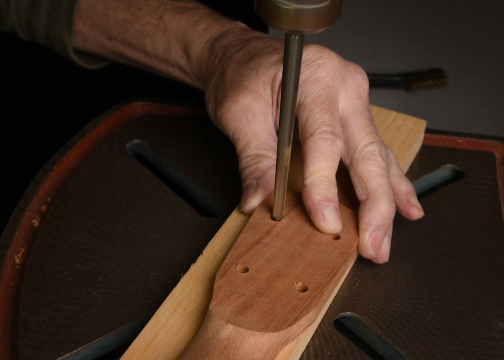
Step 1 - Drilling Holes
After laying out hole locations through drill the peg holes with approximately an .080” drill bit. Using a 1/4” Brad Point Bit drill halfway thru from the front side. Flip over and drill the other half way from the back side using the .080” pilot hole as a guide. This will prevent grain tear out from drilling in one operation.


Step 2 - Tapering the Holes

You will need a 30:1 tapered violin reamer, this is a different taper from a guitar peg reamer. Knock the handle off so it can be jigged in a drill press. Run at slow speed (approx 300 RPM) and keep the flutes brushed out to keep the tool healthy.
Determine the depth to ream the peg head to. Its a very good idea to use a piece of scrap wood similar in wood and dimensions to your peg head to practice with. The biggest mistake installing these pegs is over-reaming and making the hole too big, it’s not easy to make the big hole smaller.
The hole wants to be reamed approximately .030” smaller than the pegs diameter. Measure the smallest thread on the peg, subtract .030”, mark the reamer and ream to depth on your test piece.

Step 4 - Tools
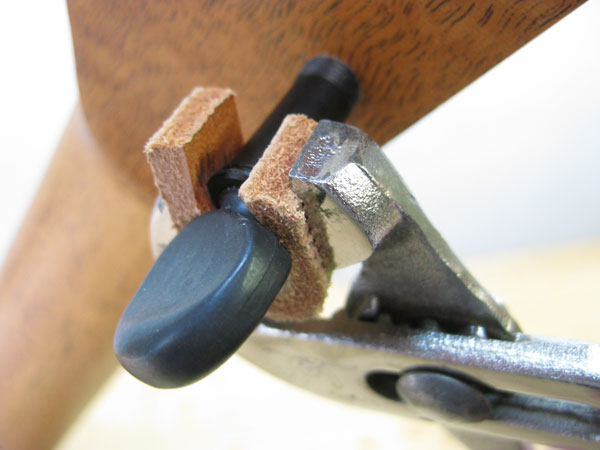
Use rib-joint pliers with a thick leather pad to wind the pegs in.
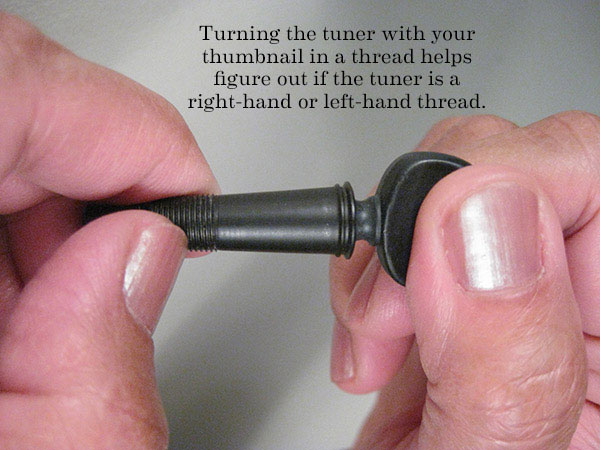
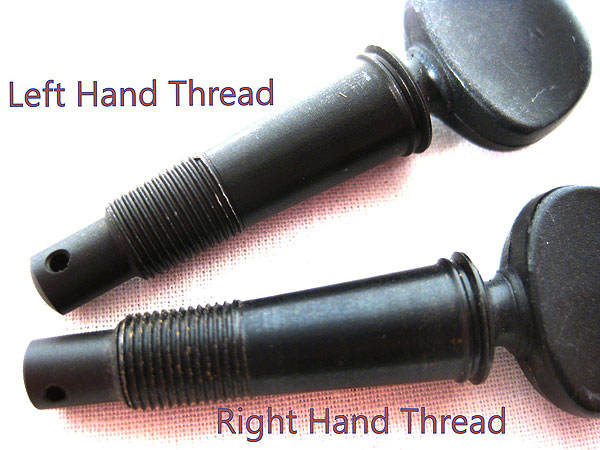
Step 3 - Identify Left and Right Threaded Tuners
The pegs are right and left hand threaded. The right hand threaded pegs install into the treble side of the peg head and the left hand (or reverse) threaded pegs install into the bass side of the peg head.


Step 5 - Fitting Pegs

The pegs should be just shy of showing their threads on the face of the peg head. Go slowly do not over ream. When winding in the pegs they will want to wander and go in anything but straight.
Watch carefully how they are progressing into the hole and do what it takes to coax them into going in straight. The nose of the tuner wants to come up and out of the middle of the hole on the face side. Watch the installation film to better understand the process. These pegs aren’t easy to install correctly but they sure are fine pegs.
Step 6 - Notes
Pay no attention to how the pegs turn in your hand before installation. You may not be able to turn them at all until they are installed.
Once installed the turning tension can be adjusted by pushing the button down to tighten up the turning tension or by pulling the button up to make them turn easier.
